Images of your products shape the authenticity of your brands. In a website, visitors are broadly engaged by the visual representation of eCommerce photography. Because of this, the quality of your products and the uniqueness of your brand are mostly determined by comparing the quality of your product photographs. Certainly, high-resolution, splendid quality product photography which is shot in a product photography studio triggers customer engagement leading them to the buyer funnel.
When a shopper visits a product page, that time he/she looks for proof of quality and value. Product photographs not only ensure the quality of your products but also influence buyer’s decisions. The decision of whether they will continue browsing and eventually make a purchase. Because these images testify to the website owners’ trust and transparency.
eCommerce Product Photography and Its Types
Product photography is a part and parcel of both online and offline sale. It is basically a technique to represent the products in an appealing way to allure prospective consumers to shop for a specific product.
Basically, there are mainly 2 types of product photography for eCommerce. To clarify, those are-
- White Background Product Images
- Life Style or In-Context Images
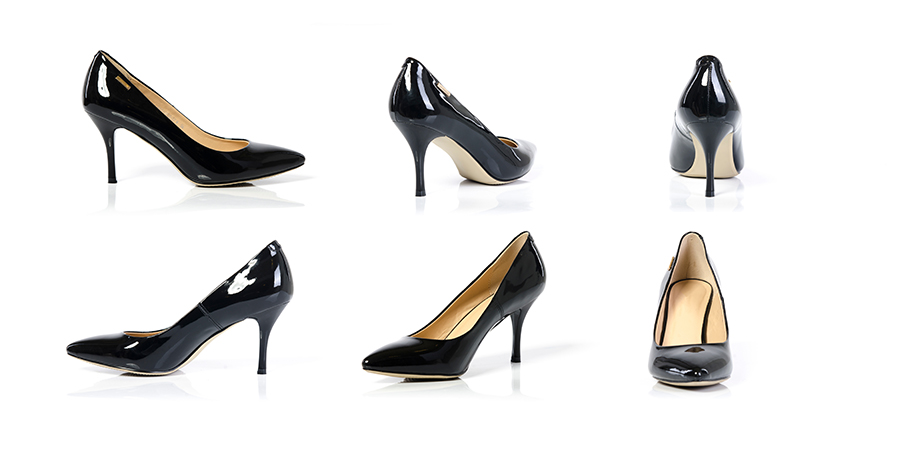
1. White Background Product Images
These are actually clean white background product photographs. It is basically needed for eCommerce photography and it is quite easy to set up in your product photography studio. Product images from different angles clearly show its features. So, you have to include your feature image with a variety of different angles. You can check Alibaba.com for example,
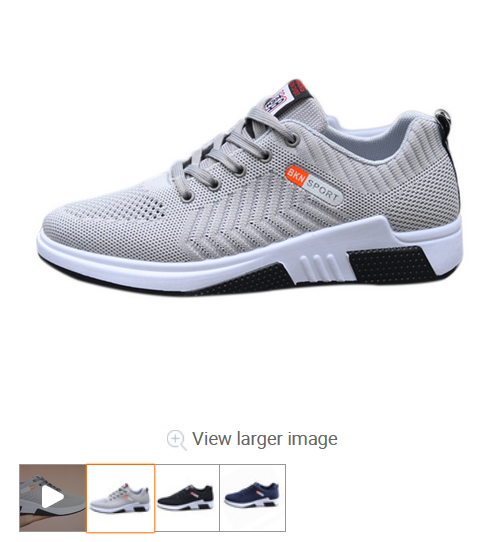
It especially shows the product from all relevant angles. These pictures define your product’s features explicitly which you must need for your product page. White background product images lead page visitors towards the buyer’s funnel.
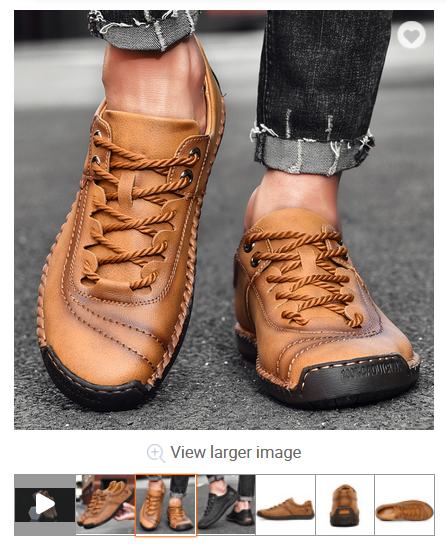
2. Life Style or In-Context Images
These images show that people are using that in a time of need. That means your product is being used where it is intended to be used. These shots are best for success stories, social media, blog posts, etc. The best practice is to add some in-context photos along with white background like Alibaba has done.
Why eCommerce Product Photography Boost Sales?
There is no way to deny that website visitors become engaged by visual images. In fact, the human brain processes image 60,000 times faster than text, and 90 percent of information transmitted to the brain is visual (Thermopylae Sciences + Technology). Your bounce rate depends on your image quality. If you fail to engage your customer, they are going to leave your site without taking any measurable action. And thus, your bounce rate is going to be increased.
Apart from that, as I have already mentioned that photographs are an essential part of the buyer’s decision-making process that leads to a sale. Most importantly, the quality of product photography reflects the quality of your products and the uniqueness of your brand. eCommerce photography also creates the first impression of the consumers about your products and brands. Therefore, the secret of boosting sales is to mesmerize your traffic by presenting polished professional images that have a better chance of customer engagement.
5 Must-Follow eCommerce Photography Tricks
Product photo shoot may seem confounding by the beginner. But after a while, it will be easier than you think if you continue practicing. The time will come when you don’t even have to think about anything. Let’s have a look at the DIY tips-
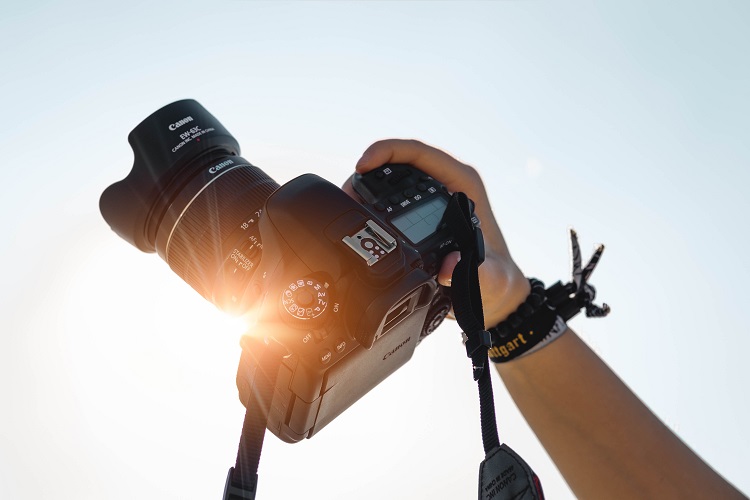
- Use the Right Camera
- Use a Tripod
- Set the Lighting
- Background and Products
- Don’t for the Image Post-Production
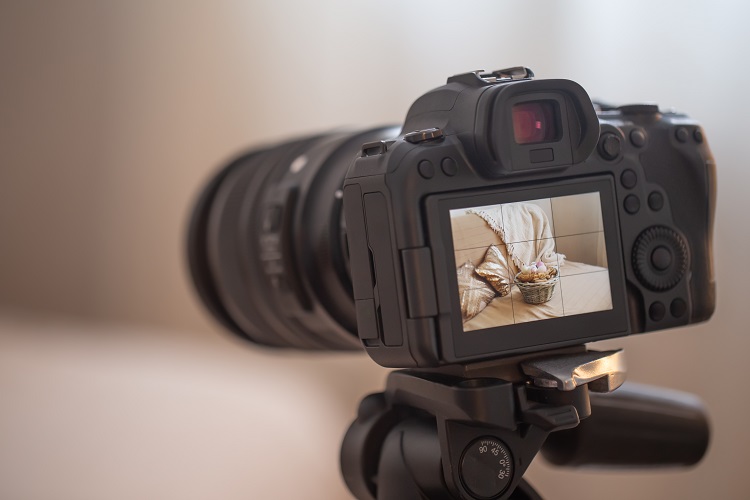
1. Use the Right Camera
The most important thing for a photoshoot is a camera. Over the years, through the development of technology, we can capture images with smartphones too. You don’t have to worry about a DSLR camera at the beginning if you have a smartphone. Sometimes, smartphones capture better pictures than DSLR cameras. But you may need one thing that is a smartphone stabilizer or a tripod. That will help reducing blur and also fasten your work if you have the correct product photography background.

However, if you use DSLR, I would recommend some settings,
- Firstly, do not use a wide-angle lens. Because it can distort your photo.
- Secondly, use the right aperture for the right shot. A wide aperture like f2.8 or f4.5 will narrow your depth of field. It may be the cause of leaving parts of your product out of focus. On the other hand, apertures like f8 or f11 will give you a wider depth of field. Along with it, that will help to keep your entire product crisp and in focus.
- Finally, don’t forget to use the correct white balance. Set it to the same Kelvin temperature as your lights at the time of the shooting.
2. Use a Tripod
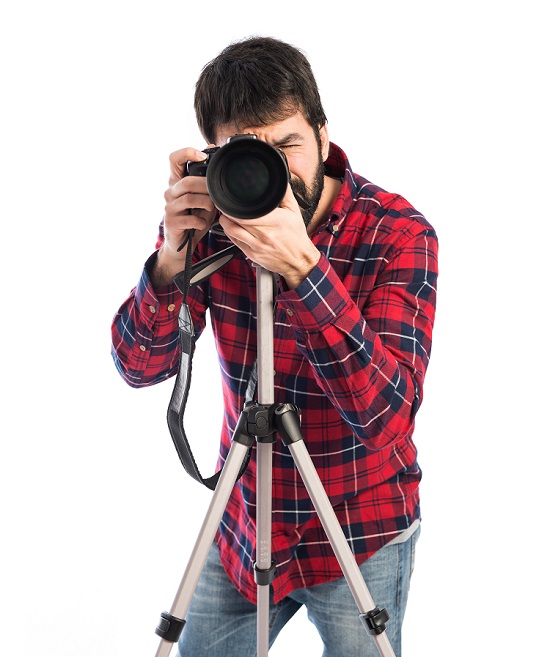
A tripod helps to keep consistency and maintain focus. If you don’t use a tripod, you may lose focus. Because in spite of having the correct product photography background, it is not possible to bring the whole product in focus while you are holding your camera in your hand. A decent tripod will be your associate for many years. Of course, some people may find it costly. But believe me, the cost is worth it. You may get one within $20 at Amazon.Com. However, don’t loosen your heart if you can’t pile up the money. Remember there is always an alternative. In the beginning, you can use a stool or a pile of books to keep your camera steady and buy a tripod afterward for product photography.
Set the camera very small aperture to have the most depth of field, your camera is capable of. Use a slower shutter speed to allow more light through. When a camera has a slow shutter, you can’t hold it in your hand. Otherwise, the subject will be blurry. So you definitely need a tripod to fasten your work.
3. Set The Correct Lighting
Lighting setup is the most tricky part. It is one of the factors that define the quality of your photos. Setting up the correct lighting might seem difficult. If you have a product photography studio, it won’t seem difficult. But once it is correctly done, nothing can stop you from getting awesome results. Besides that, accurate lighting naturalizes post-production or post-processing tasks. Well, you have two options you can use,
-
-
- Natural Lights
- Studio Light
-
Natural Lights
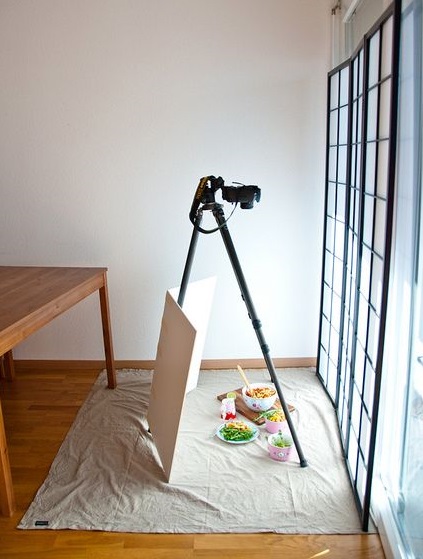
The natural light is much easier to manipulate. It is actually the best option for the people on a budget. You have to place your shooting table near a window in your product photography studio or home. The window should be large enough to let a lot of light come into the room. If you feel the light is too much, you can use a cloth to reduce it. Over reflecting shadow might be a problem. To keep it at a exact proportion, you can use white plasterboard or cardboard on each side of the object. It will help to soften the shadow.
Most importantly, don’t forget to shoot when there is full of light so that you have a chance to play with it. It is better to shoot in heavy sunlight and minimize it later on. Because, it is pretty hard to create perfect lighting during post processing if their isn’t enough lighting. Nevertheless, one thing to keep in mind that is do not shoot under direct sunlight because it may create harsh shadows.
Studio Lights
Artificial lighting gives you more control over your shooting process. It is mostly needed when you are shooting multiple products in a shorten period of time. Because studio lights maintains the consistency and make the editing easier. However, it can be expensive. If you are just starting out, a two clip-on light clamps, with strong bulbs for under $30 can usually work well. On the other hand, you can buy set of two softbox lights for about $50 if you have a slightly high budget.
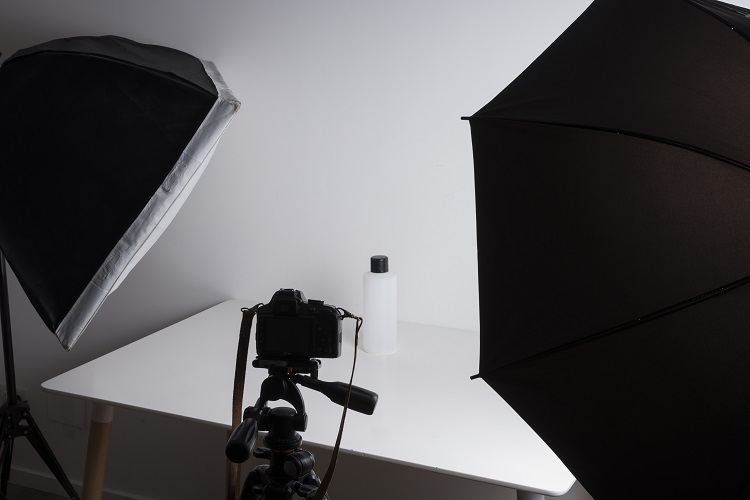
In your product photography studio, the setup of one light will serve as your key light, and the other as your fill light or backlight. That depends on your desired results though. To achieve softer shadows for eCommerce photography, you have to diffuse the light by placing some white paper or cloth over them. Notwithstanding, when your fill or backlight is on the opposite side, back or above, your key light must be settled in the front, or sometimes slightly to the side of the product. Keep adjusting the angles and distance of the lights, until you are satisfied with the soft, evenly distributed shadows. Subsequently, you can also use white plasterboard to disseminate some of the light and further soften those shadows.
Studio Lights are best for diffusing or distributing the light fairly around the product. Therefore, once you complete setting up the light, you will have a consistent setup for your product photoshoot.
4. Background and Products
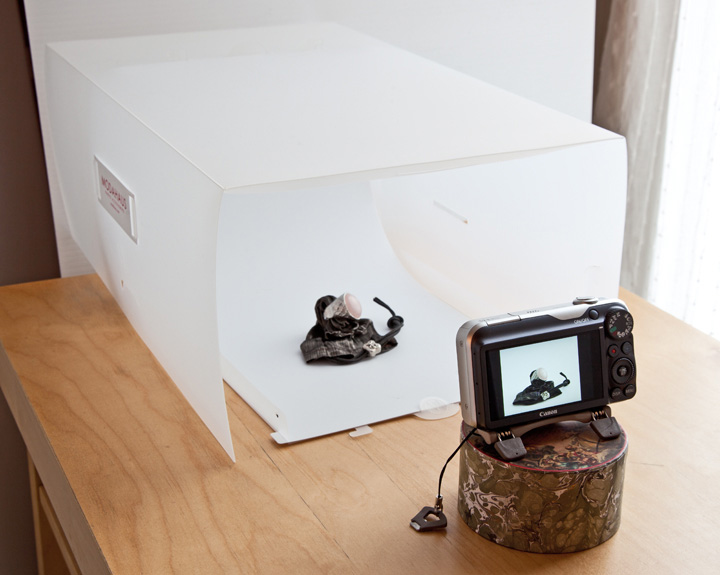
To simplify your post-processing work, you have to choose the right product photography background in your product photography studio. Use a White Background because that eases your job while removing it at the time of editing. You can buy a white sweep from Amazon.Com. A sweep is a backdrop that helps to transits from the vertical to horizontal plane. To clarify, I can say it is basically a wall that curves down into the floor.

You have to be careful and avoid the sharp edges of a corner where light bounces around. A unbalanced curve make it difficult for the camera to capture depth and contours in the background.
Set your products up in the front of your background. Make sure that the product lays in a flat, stable surface.
5. Don’t forget the Image Post-Production
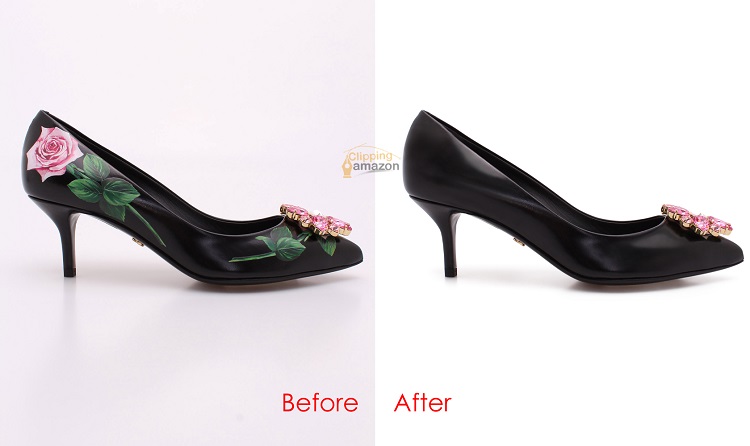
How carefully you shoot the photos, you are still gonna need to get a post-production service for your eCommerce photography. Your photos need to be edited to have a polished elegant look. Editing ensures the difference between mediocre and professional results. For a person, it would be pretty difficult to both shoot the photos and edit them. Because photo editing is a time-consuming process and it is pretty difficult to do it correctly without a professional. So, you must get an editing service.
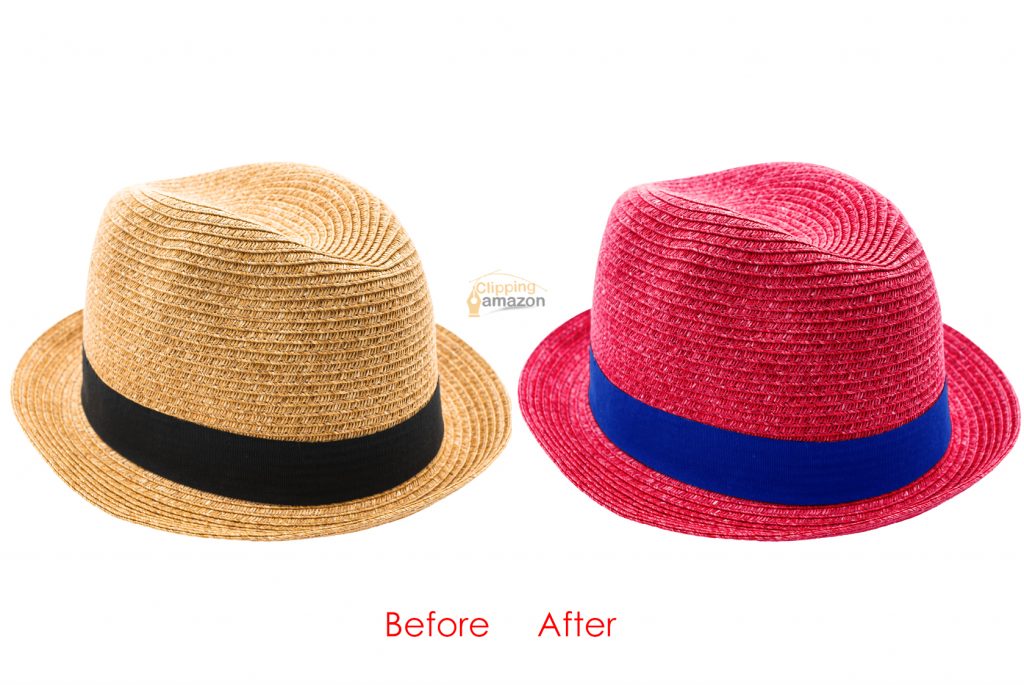
Luckily, Clipping Amazon is always available to help you with all of your photo editing needs. We provide 17 photo editing services including retouching, background removal, color correction, ghost mannequin or neck joining, shadow and reflection service, raster to vector, etc. You can pick as per your need. The best part is, you don’t even have to worry about the cost because Clipping Amazon is quite a budget-friendly service provider starting from $.39 only. You can also have a FREE TRIAL if you want! Just send your test image and we’ll deliver that within 30 minutes! If you don’t want to continue the deal after the free trial, that’s completely okay with us.


Thanks for sharing for your nice post about #1. I love this , thanks again for sharing.