Adobe Photoshop plays a vital role in almost every digital artist’s life. Photoshop is commonly using by artists, photographers, graphic designers, and some web developers. The tool is so much flexible that you can achieve the same results in several ways. So, the photoshop shortcut keys always make our work easier.
People use Photoshop every day, so photoshop shortcut keys are a vital part of the workflow. It helps to save time and to focus better on digital illustration. In this article, we are displaying the Photoshop shortcuts that we use repeatedly _ some of its features help us be more profitable, and it’s the main parts of our creative process.
To profit the most from this article, some familiarity with Photoshop would be required. No matter if you are a fresher or an advanced user. But You should follow this article because all techniques are explained in detail.
Introduction To Shortcuts: The Path To increasing Your Productivity
Every artist, designer, web developer or photographer, has likely once opened adobe Photoshop and has sharp and clicked on an icon to use the Brush tool, the Move tool, the crop tool, and so on. Using Photoshop is very common but many of those who do not use Photoshop shortcut keys tools find it difficult to work. However, what we would like to talk about before getting into the details, is the importance of shortcuts.
When you think about it, you’re saving probably half a second by using a keyboard shortcut. This time instead of moving your mouse over to the Tools bar and selecting the tool, you need to click on the tool’s very little icon. To that may seem petty, however, do figure out that every half-seconds add up to become hours in the end!
Now, before we continue, please note down the following things
1. Shortcuts Notation
we use Photoshop on Windows but all of the photoshop shortcut keys should work the same on Mac OS. The only thing value mentioning is that the ”Ctrl” (Control) key on Windows assembles to the ”Cmd” (Command) key on the Mac, so we’ll be using ”Ctrl/Cmd” throughout this tutorial.
2. Photoshop CS6+
All the features and shortcuts allowed here should work in Photoshop CS6 and later — including the latest Photoshop CC 2020.
The Keyboard Shortcuts Window
To start, we would like to show you where you can find the Keyboard Shortcuts window. where you could modify the already existing photoshop shortcut keys, and learn which key is bound to which feature or tool.
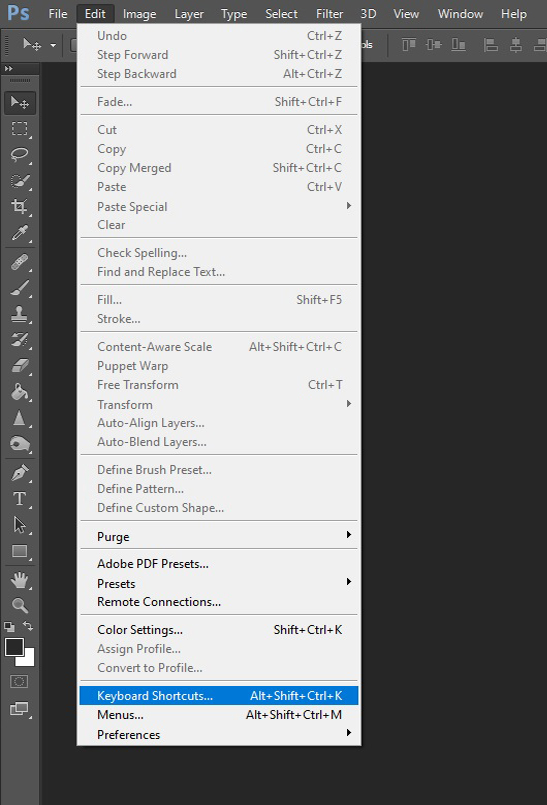
Open Adobe Photoshop, go to Edit and select Keyboard Shortcuts. Another, you can enter the same from here: Window → Workspace → Keyboard Shortcuts & Menus.
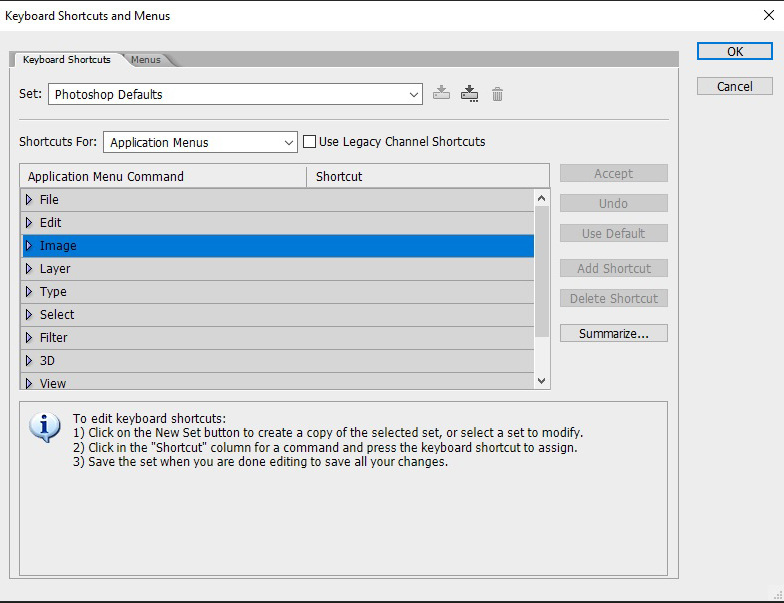
Now you will be found by the Keyboard photoshop Shortcut keys and Menus window (dialog box). where you can select a category and you can check out. There are some options in there. The main three options are – (accessible through the Shortcuts for…. the dropdown list) are…
- Application Menus
- Panel Menus
- Tools
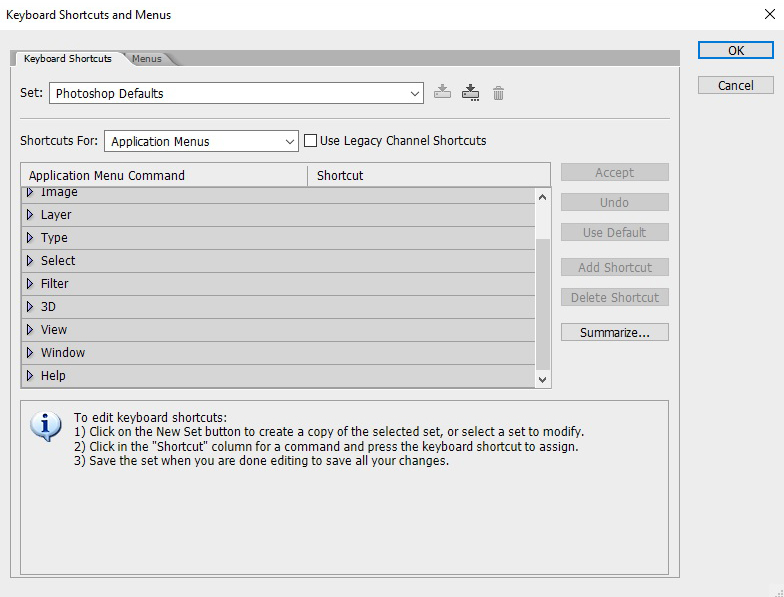
Generally, the Application Menus will be the first thing you’ll see. There are the shortcuts for the menu options you will see on the top of Adobe Photoshop’s window – (File, Edit, Image, Layer, Type, and so on).
So for example, if you’re using the Brightness/Contrast option often, instead of clicking on Image (in the menu). After that Adjustments and finally find and click on the Brightness/Contrast item. Then you can simply assign a key combination and Brightness/Contrast will show right up after you press the keys assigned.
The second section, Panel Menus, is an interesting one as well, particularly in its Layers portion. You will see various options, that could be of use to you depending on the type of work you need to do. So the New Layer shortcut is (Ctrl/ Cmd + Shift + N) but also you can set up photoshop shortcut keys for Delete Hidden Layers. Helps reduce the size of Photoshop files, if we delete the unnecessary file. Therefore it helps enhance performance as a result of your pc won’t cache on those additional layers.
In the 3rd section tools, where you can see the shortcuts of all the tools found in the left panel of Photoshop.
Advance Tip For Photoshop Shortcut Keys
To cycle among any of the photoshop shortcut keys tools that have sub-tools, For example, the eraser tool has a background eraser and a magic eraser.
So, you just need to hold your Shift key and the applicable shortcut button. In the section of the Eraser example, press Shift + E several times until you reach the desired sub-tool.
One last thing, we would like to notice before wrapping up this section is that the Keyboard Shortcuts and Menus allows you to set up different Profiles. Adobe photoshop calls them “sets” but we think that “profiles” better suits the purpose. So that if you don’t really want to mishmash with the Photoshop Defaults one. You can simply create a new personalized profile. It’s noticed that, when you create a new Profile, you get the Default set of Photoshop Shortcut keys in it until you start modifying them.

The Keyboard Shortcuts keys menu can take a bit of time to get around to. However, if you spend the time in the beginning. You will get benefits later.
SEE ON THE PHOTOSHOP SHORTCUTS KEYS ON THE LEFT SIDE OF YOUR KEYBOARD
After people recognized the use of using photoshop shortcut keys, at last, they agreed that time is being wasted moving your hand from one side of the keyboard to the opposite one.
Now let us show you the shortcuts that we (Clipping Amazon) most often use (and why).
How To Increase And Reduce The Brush Size
In order to increase or reduce the size of your brush, you need to:
- Click and hold the [Alt] key. (On this would and Mac be the [Ctrl] and [Alt] keys),
- Click and set the right mouse button,
- Then drag horizontally from left to right to increase, and from right to left to reduce the size.
If you’re using anything from Adobe Photoshop CC 2017 and above, try pressing [ Fn + Ctrl + Alt ] while dragging.
The moment we learned about this shortcut, we literally couldn’t stop using it!
[ and ] keys which are the other ones for increasing and decreasing the brush size.
Photoshop Keyboard Shortcuts: For Brush Tool
- Brush – click the letter “B” on your keyboard
- Brush Resize – Right Click + Alt + Drag left or right
- For Brush Softness for (PC) – Right Click + Alt + Drag up or down
- For (Mac) Brush Resize – Command + Option + Drag left or right
- Brush Softness For (Mac) – Command + Option + Drag up or down
- Brush settings – Simply right – Hit while you have the brush tool selected. Click the “enter” key to exit this panel
- Sample colors while using the brush tool – Hold the Option / Alt key to temporarily switch to the eyedropper tool.
Adobe Photoshop Keyboard Shortcuts: For Color
Eyedropper Tool – Click the letter “I” on your keyboard
Toggle Foreground / Background Color – Click the letter “X” key on your keyboard
Default Colors – Click the letter “D” on your keyboard.
Adobe Photoshop Keyboard Shortcuts: For Selection Tools
- Magic Wand Tool – Click the letter “W” on your keyboard
- Add to Selection – Hold the Shift key while using a selection tool
- Marquee Selection Tool – Click the letter “M” on your keyboard
- Deselect – Command / Ctrl + D
- Lasso Tool – Click the letter “L” on your keyboard
- Pen Tool – Click the letter “P” on your keyboard
- Load Pen Path Selection – Once you have a closed path, Click Command / Ctrl + Enter to load the selection
- Create Bezier Curve – With the pen tool selected (letter P) click to add an anchor point, then hit and drag to add another.
Photoshop Shortcut key: For Retouching Tools
- Healing Brush Tool – Click the letter “J” on your keyboard
- Toggle between Healing Brush Subsets – Hold Shift + Click the letter “J” on your keyboard
- Healing Brush sample point – Hold Option / Alt, then Hit to choose a sample point
- Clone Stamp Tool – Hit the letter ( S ) on your keyboard
- Clone Stamp Tool sample point – Hold Option / Alt, then hit to choose a sample point.
Want to know details about retouching services Visit Here
Photoshop Keyboard Shortcuts: For Transform Tools
- For Free Transform – Click Command / Ctrl + T.
- Do Scale Proportionately – Hold the ( Shift ) key when you’re in the free transform mode.
- Scale from the center point of the Photo – Hold (Shift + Option/Alt).
Conclusion
In this article, we (Clipping Amazon) shared some of the photoshop shortcut keys we mostly use. That’s why Clipping Amazon always provided clients’ work in a timely. We sincerely hope that the photoshop shortcuts key will help you boost up your productivity and make your workflow better as well.