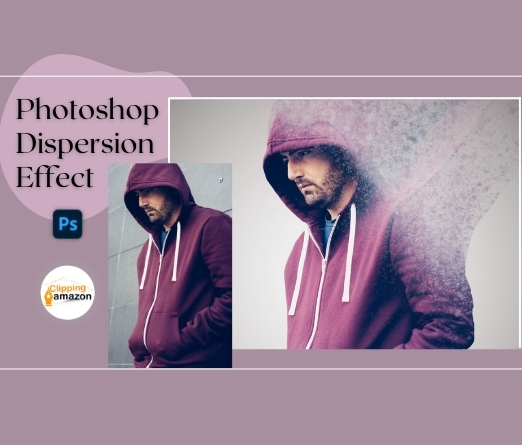
Photoshop dispersion effect is a splendid way to include a bit of dramatic flair to the image. If you want to create mesmerizing dramatic effects, the dispersion effect is for you. So, you are gonna learn the Dispersion effect Photoshop tutorial step by step in this blog.
Photoshop Dispersion Effect Tutorial
Special effects help us to express our inner feelings and tell a story through photos. But it can be tough to get them right. Therefore, you are gonna need some help from the experts. It can be confusing at the beginning, but you will figure it out gradually.
Let’s learn how to create photoshop dispersion effect-
in this tutorial, I will let you know how to create a dispersion effect in Photoshop. You will also learn the use of layer combinations, filters, adjustment layers, layer masks, brushes, and so many other things. So, let’s get started…
Step 1: Open The Image
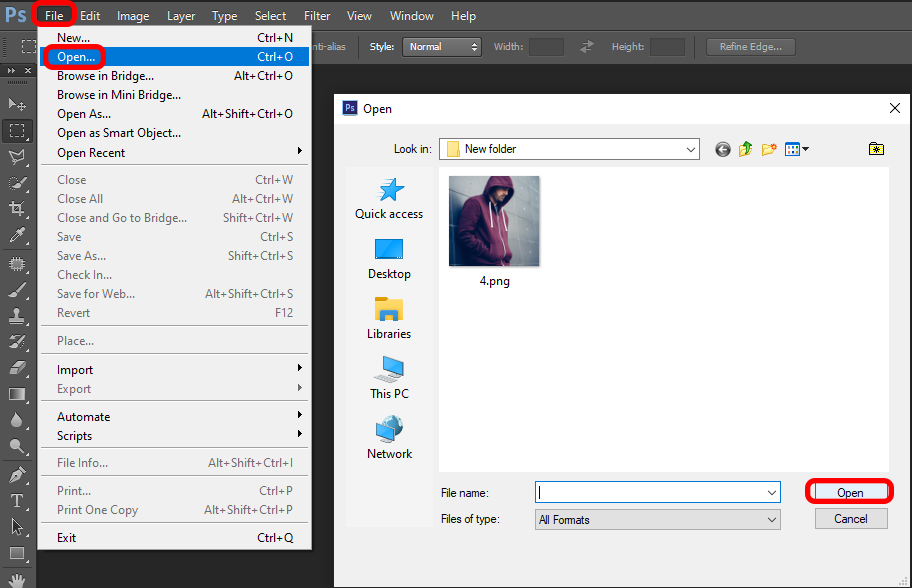
The very first step is to open an image to create the effect. So, my recommendation is to use an image with a plain background. Because a plain background image can reduce some work. So, at first, you have to open the image into photoshop. You can press “Cntrl+O” to open the image file. On the other hand, you can open by clicking on “File” from the top bar and then click “open“. After that select the image and hit “OK“. Your image will be opened.
Step 2: Duplicate The Layer
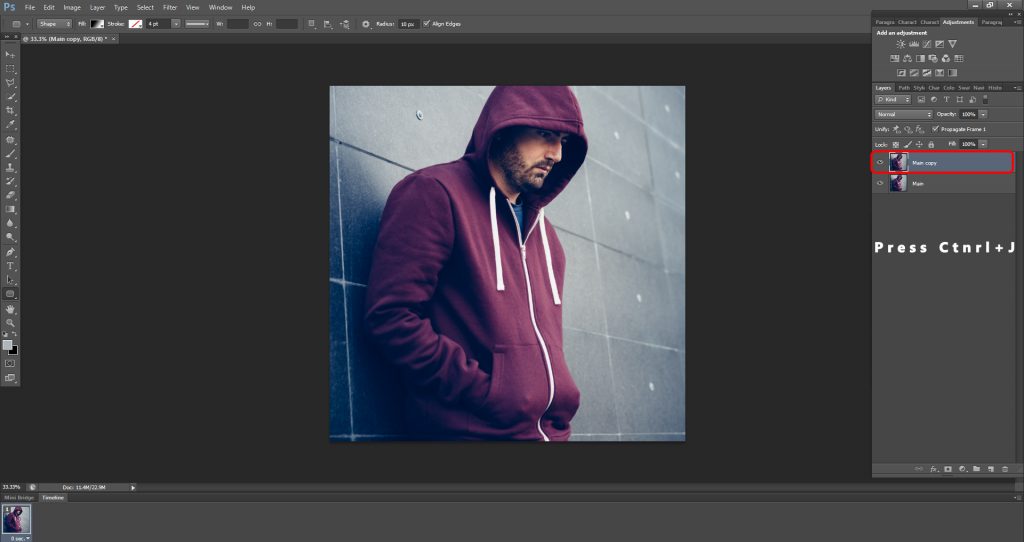
After opening the image, the first task is to duplicate the main layer. You gotta keep a backup because you don’t know if you are going to be successful. So, if you screw up, your backup image is gonna help you. Therefore, select the main layer and press “Cntrl+j” to duplicate it. Or, you can simply copy the layer by pressing “Cntrl+C” and then paste it by pressing “Cntrl+V“.
Step 3: Seperate The Object & Remove Background
The next task is to remove the background. So, you have to separate the object from the background to create a photoshop dispersion effect. For this, you can have to use selection tools. I am going to use the “quick selection tool” in this case.
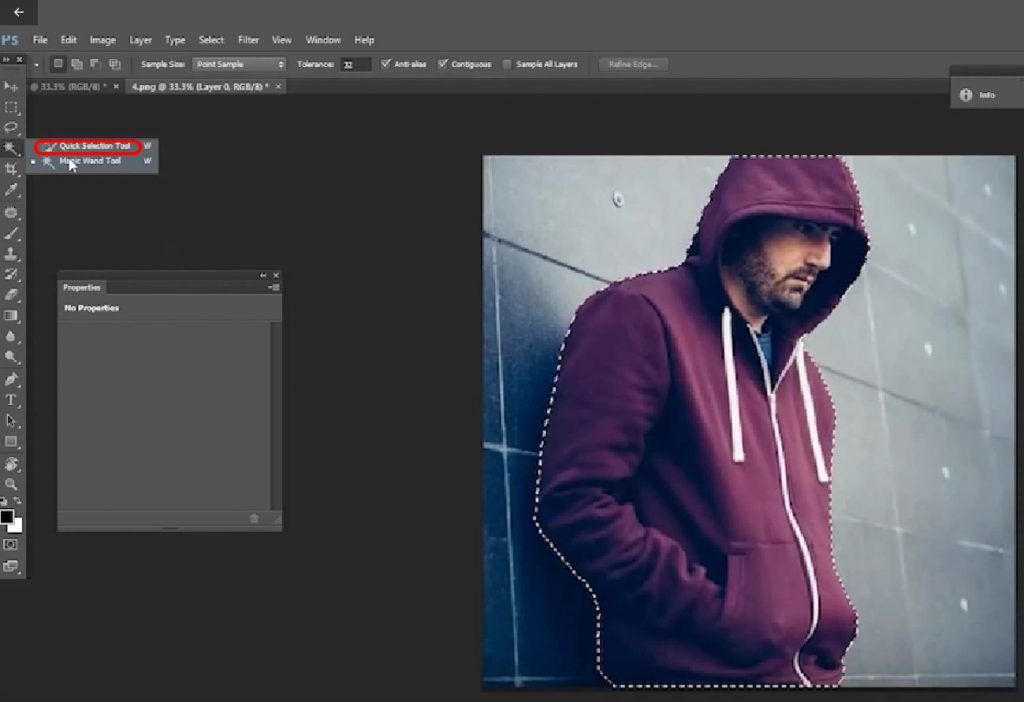
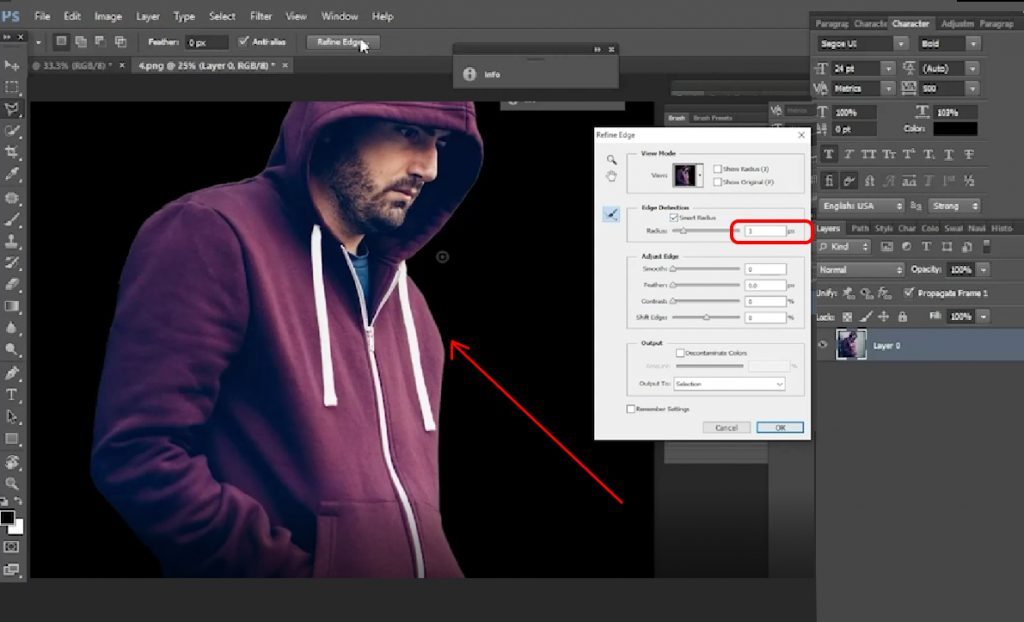
Select the object only to separate the background. Your selection may not be accurate. So, you have to use the “refine edge” tool for the perfect selection.
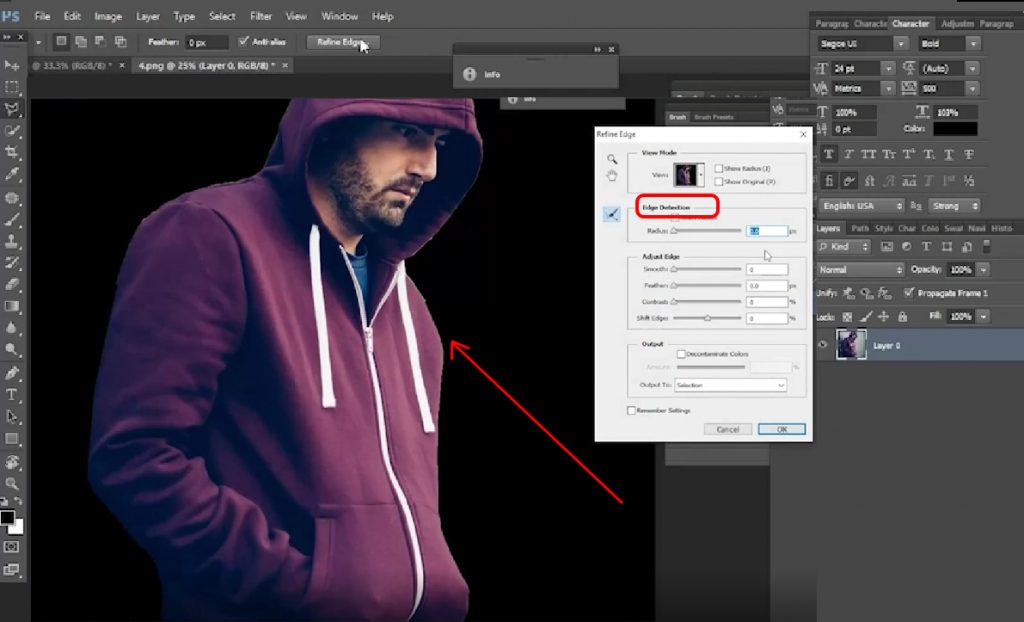
First, go to refine the edge and increase the “smart radius”. You can see in the following image that the rough edges are gone.
Step 4: Make Duplicate of the Separated Object
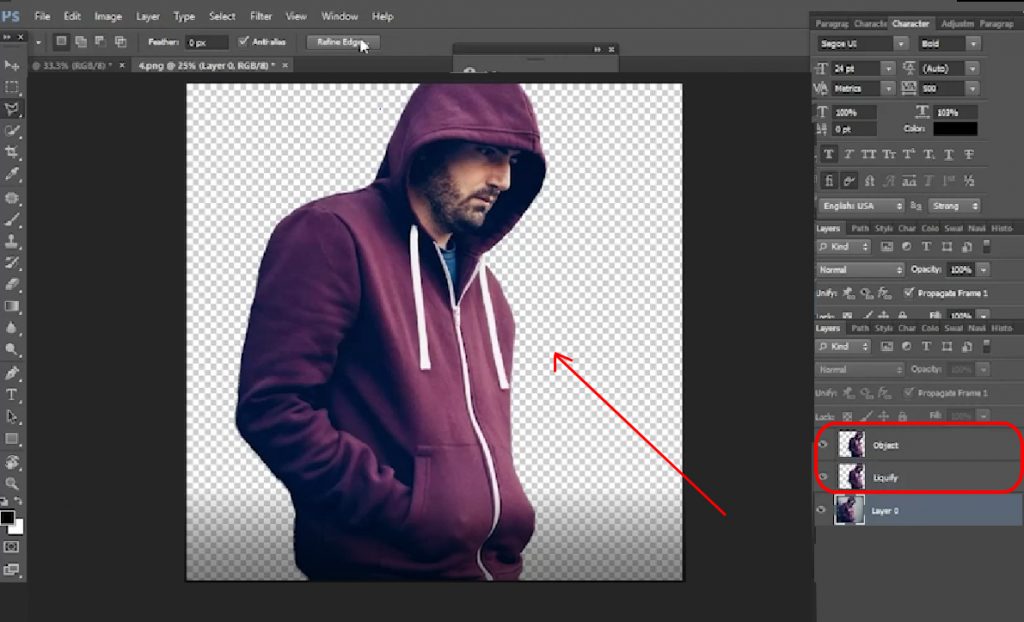
At this time you have to make two duplicates of the separated object. For this, you have to press “Cntrl+J” while the object is selected. The object will be copied in a new layer without any background. Press “Cntrl+J” twice to create two layers. Now name the 2nd layer as “liquify” as we are going to add liquify filter to this layer.
Step 5: Set a Background
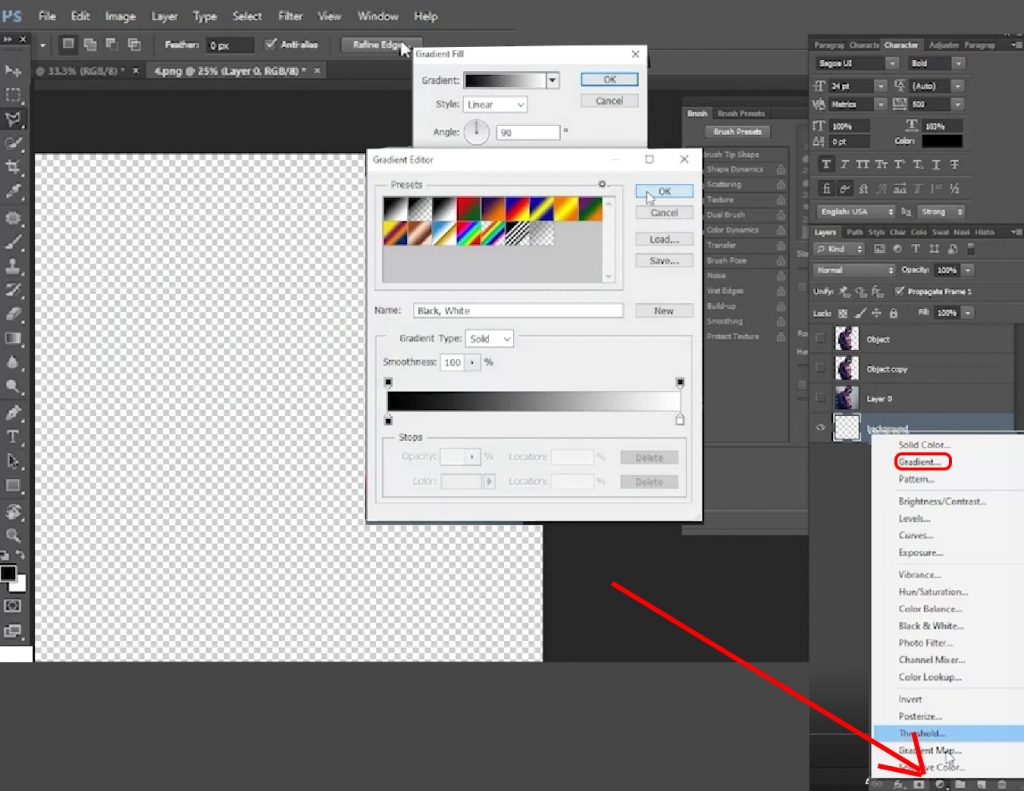
to focus on the photoshop dispersion effect, you should set a background. I will take a black and white gradient from the adjustment layer. For doing this, take a new blank layer. Then, select “gradient” from the adjustment layer. Select the color preset of your choice.
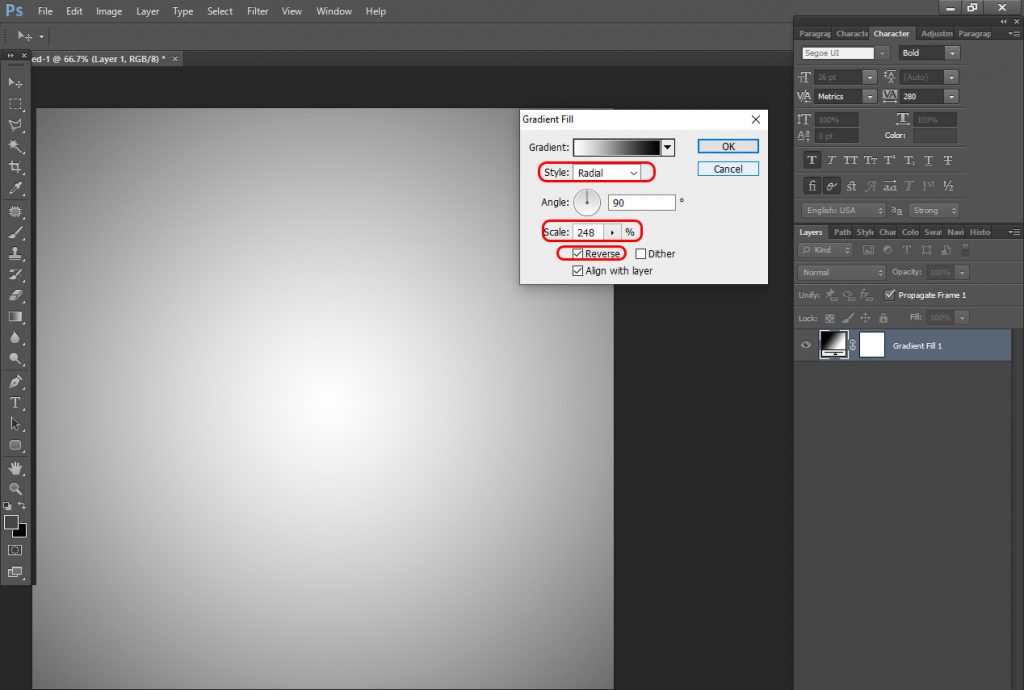
After that set the “Style” as “Radial“. Also, increase the “Scale” and make sure to “checkmark” the “Reverse” option. Now you can see the background looks better than just one-color background.
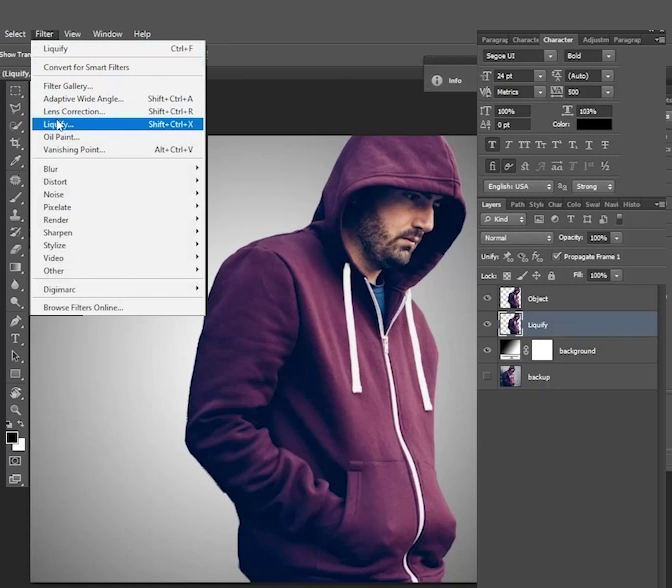
Step 6: Add Liquify Filter
Now it’s time to add the “Liquify” filter for creating Photoshop dispersion effect. To do so, at first, select the layer that you named “liquify”, go to “filter” from the top bar. Then, go to “liquify”.
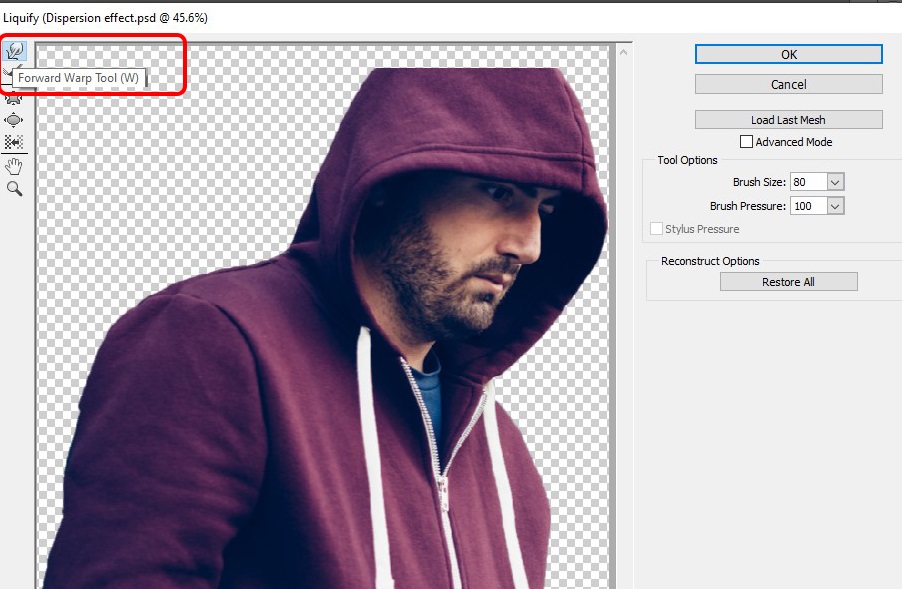
You will see a popup box. Select the “Forward Warp Tool” tool from there.
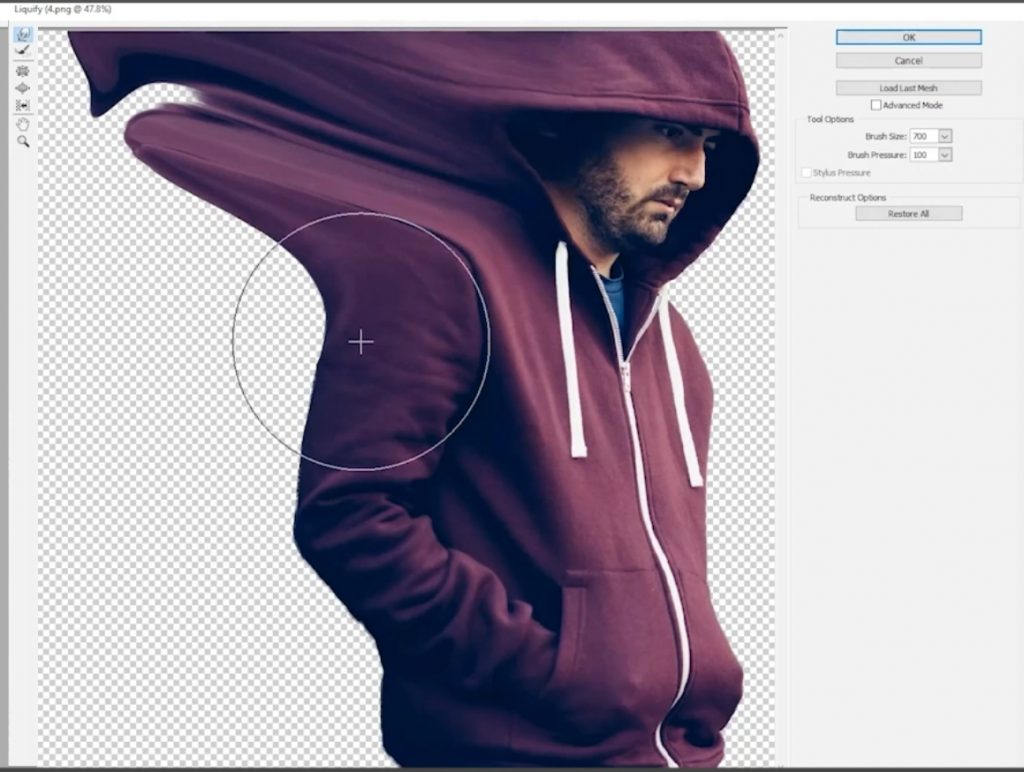
Adjust the brush size and start stretching the backside of the image. Keep it slow, don’t rush. Otherwise, the photoshop dispersion effect may not be accurate.
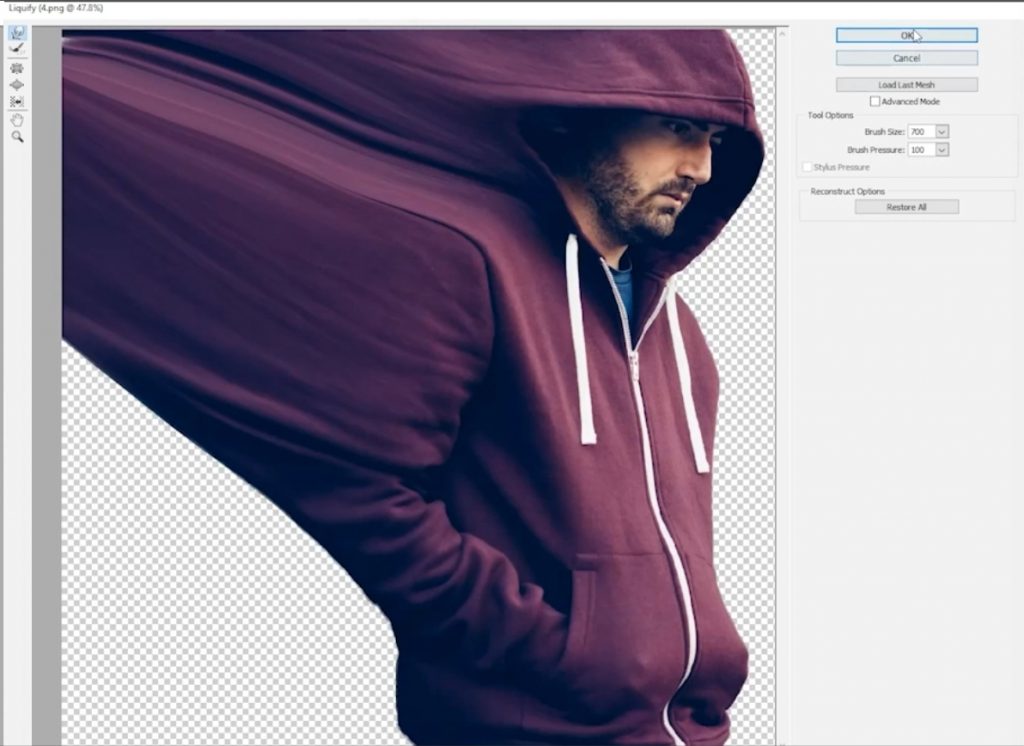
Once you are satisfied with it, hit ok. Your image will look like this-
Step 7: Add Layer Masks
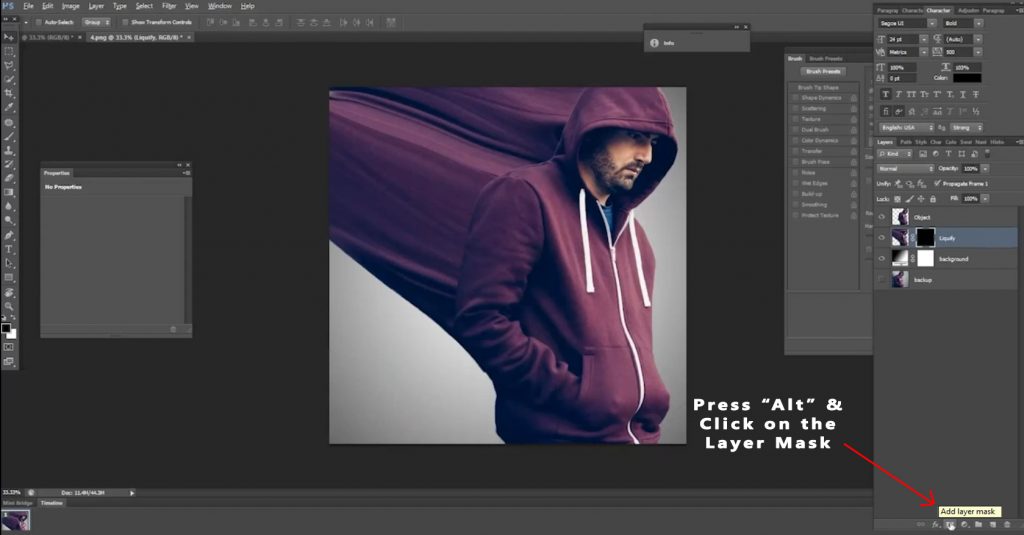
At this moment, we have to add layer masks to the liquify layer and the model layer. We can create that from the “Add Layer Mask” option at the bottom.
We have to add a negative layer mask to the liquify layer. For this, I have to first select the “liquify” layer, press “alt” from the keyboard, and click on the “Add Layer Mask” option. The liquify effect will be hidden under the negative layer mask.
In the model layer, we have to add a layer mask only, not a negative one. For this, just select the layer and click on the “Add Layer Mask” option. A mask will be created.
Step 8: Select the Brushes and Paint
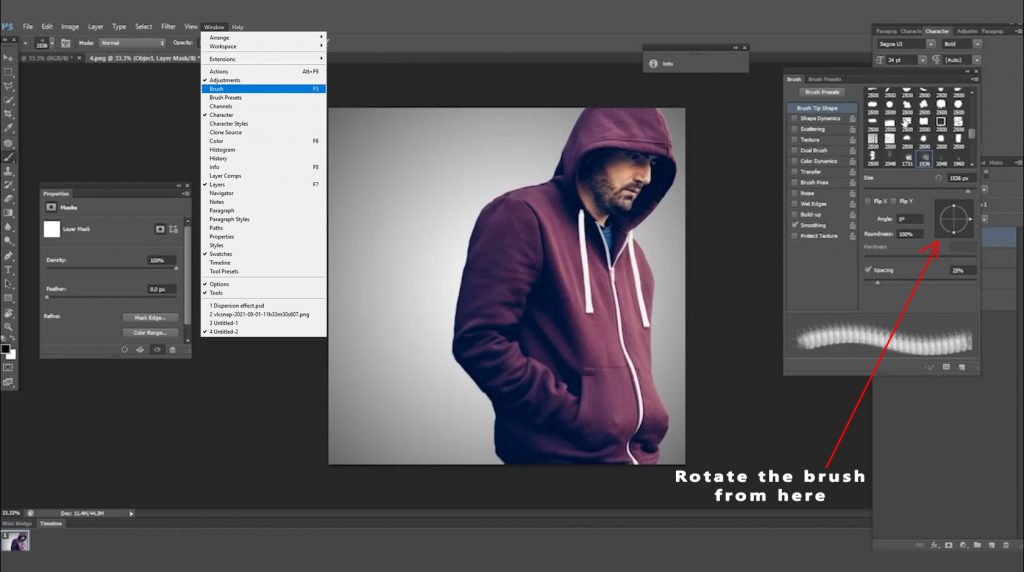
Now it’s time to select the brushes and paint. After that, It’s time to select the brush tool. Select the brush of your choice and paint over to create the effect. I will have to rotate the brush, so I am selecting “window” from the top bar and then select “brush“. You will see a pop-up box. You can rotate the brush from here.
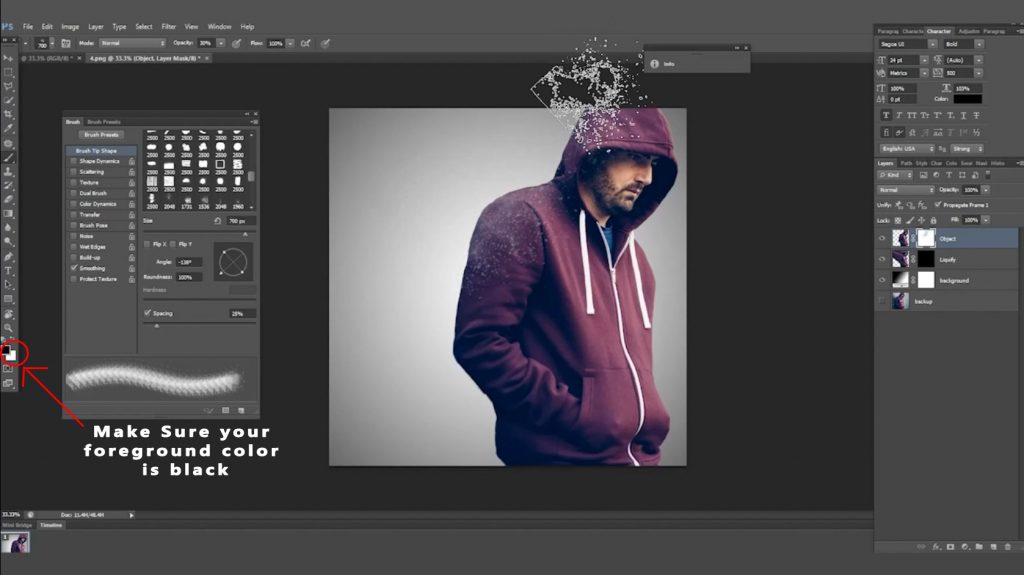
Before painting over, at first, click on the layer mask of the top layer or model layer and activate it. Adjust the brush size and paint over. Make sure your foreground color is black.
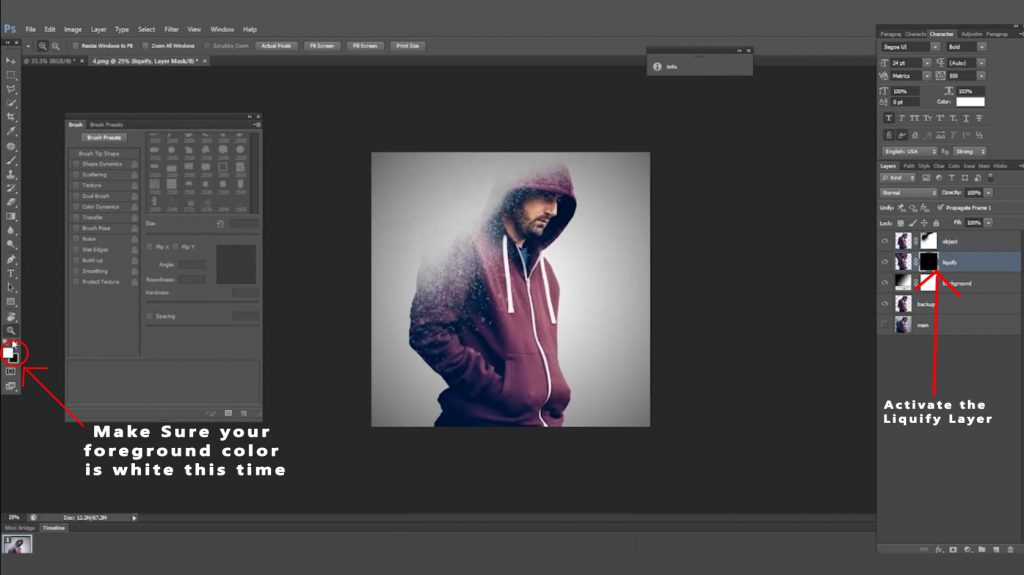
Once you are satisfied with it, click on the liquify layer, activate the negative layer mask. This time make sure the foreground color is white. Adjust the brush and paint over.
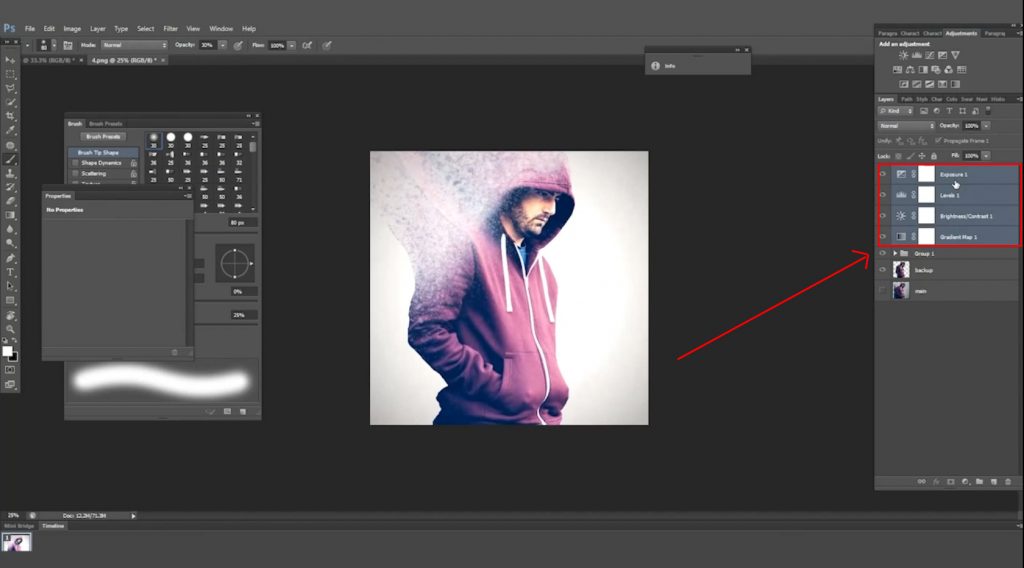
Step 9: Adjust the Brightness, Levels, and Exposure
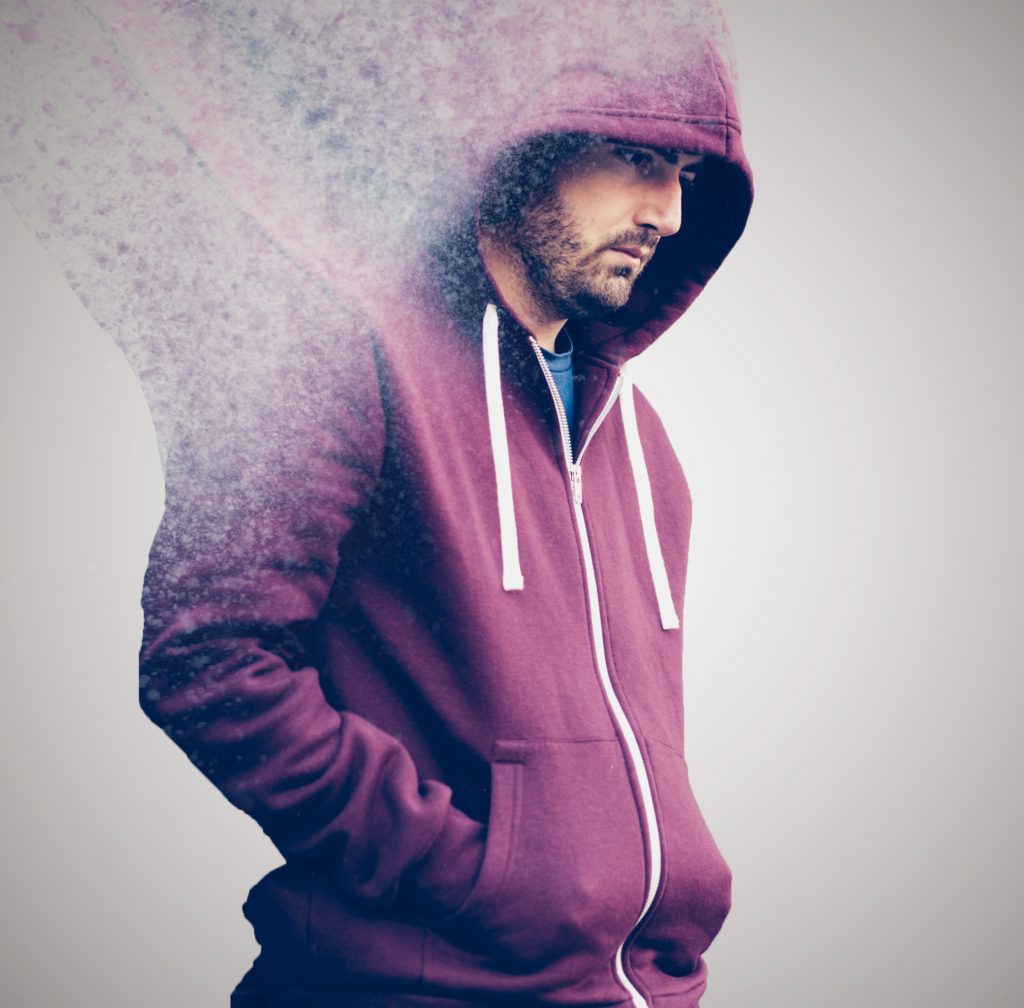
After you are satisfied with the painting, you may have to adjust the brightness, levels, and exposure. Play with those a little bit, I am sure you will find out the best. Once you have completed, adjusting those, the photoshop dispersion effect will be created.
Then press “cntrl+altr+shift+e” to create a new layer containing all the layers and effects. To clarify, if you press those keys, it will accumulate all the layers into a new single one. Then you can save the image file in JPEG, or PNG format. It is better to save the PSD file also.
Hope you have enjoyed and learned something new. If you want to learn exclusive photoshop tutorials, you can come back to Clipping Amazon. We are a photo editing service provider. Therefore, if you need any image editing service, you know where to find us.