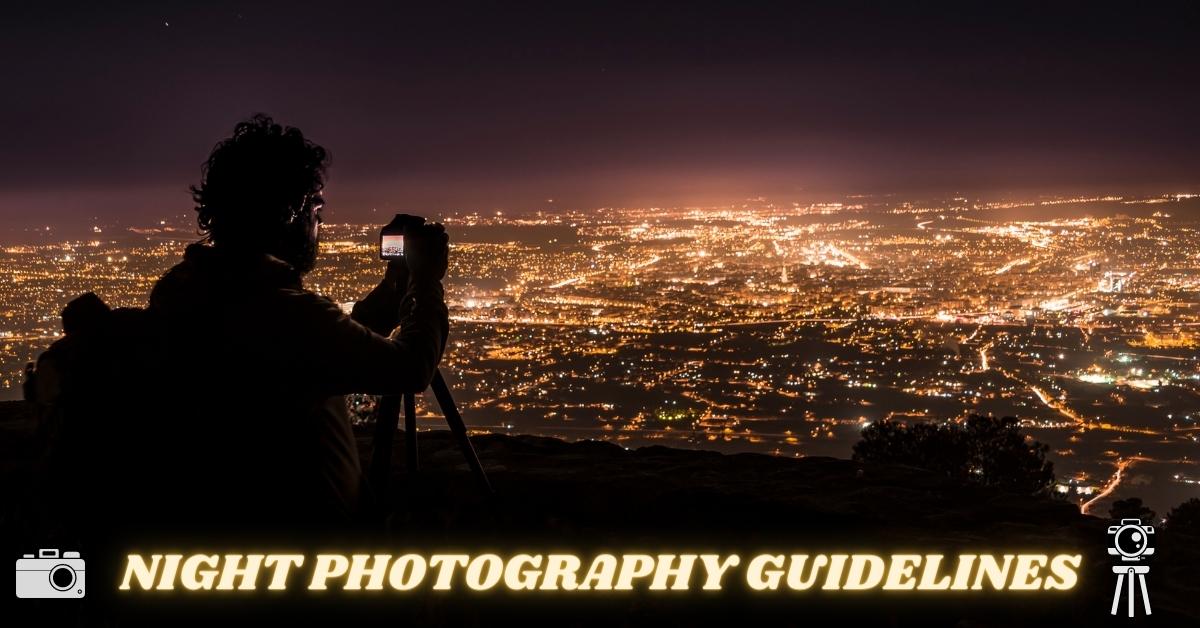
Night Photography is not an easy job because perfect night photos require perfect skills. Looking for a perfect guide to take your night photography skills to another level? We will! This seems to be a challenging and rewarding job for a beginner. You may have to stand outside for a long time at night to capture a specific sky element or event. Even if it’s cold or cloudy outside the house, you need to keep yourself out there to get some perfect shots.
As a night photographer, you are in control of the exposure settings for the camera, and you can adjust them to suit any scene that you’re trying to shoot. You can adjust shutter speed, aperture, and ISO to make sure that you capture a great shot. You can also use the exposure bracketing feature to capture multiple shots with different exposures. There are many ways to capture night images, but you need to know what kind of image you want to get before you start shooting. You may be looking to capture a starry sky, a cityscape, or maybe an underwater scene. If you want to capture night images of any of these, you’ll need to adjust your camera settings accordingly. Here are some tips to help you capture great night photos.
Best Camera Settings for Night Photography
Camera settings are essential for capturing the night sky or other objects. In this section, we will let you know about night photography settings to get the best results. Discussions include Aperture, ISO, Shutter Speed, Manual Focus, White Balance, etc. Let us focus on the following points.
- Before applying other settings, put the camera in manual mode for night shooting. This allows you to give better captions in that environment than in automatic mode.
- It is better to use a wide aperture for night photography. This is because the light should enter the camera sensor. Since you are photographing in dark mode, it is essential to have a large aperture to enhance the brightness of the environment.
- Many newcomers try to find the best ISO for night photography. Like Aperture, your ISO settings should be kept higher in night photography. This makes the sensor more responsive to light which helps to reveal your photos For this, you may need a suitable camera body to manage the ISO settings.
- Change shutter speed according to subject and lighting. However, you can keep the settings at 10 “. Sometimes, it will require less than the number mentioned for an amazing shoot, and sometimes even more.
- In general, it is better to set up an automatic white balance. But we recommend adjusting manually at night. Suppose you have to shoot in an urban or suburban area. Then, it will work better with manual white balance instead of automatic mode. You can adjust it according to the view and demand.
Tips And Techniques For Beginners
Now, it’s time to publish the essential tips and techniques for night photography. You already know the camera settings for this. Now, you can pack bags and luggage with the necessary materials for the perfect photoshoot. We have chosen some professional tips so that you get the most amazing results with less effort. However, this is not a biblical or essential theory. However, it can help you in many ways to get the right night photography ideas.
Necessary Equipment For Night Photography
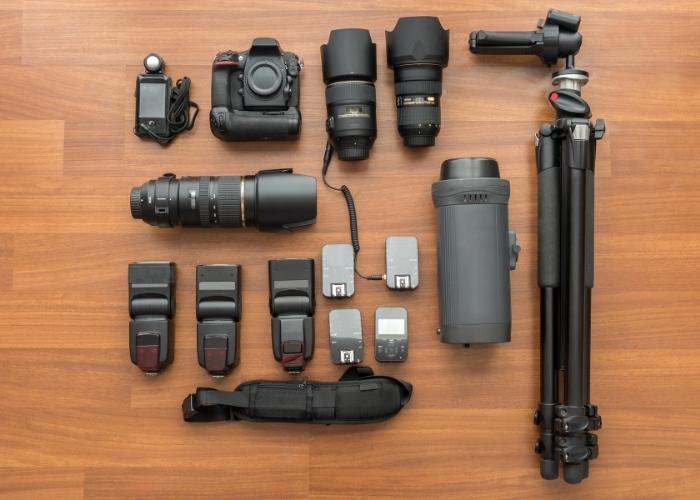
Every photography requires some necessary materials before shooting. And, whether it’s about night photography, you must carry some equipment such as a camera, flashlight, tripod, lens hood, neutral density filter, extra battery, and sometimes some other things you need. No need, always carry all materials. It varies with the environment, lighting, and other parameters.
For example, a tripod is a helpful element of night photography that is recommended by most professionals. Since we have to take shots in the blur, it will require a long exposure. As a result, the camera can take from seconds to minutes in that situation to capture a perfect shot. For that reason, a tripod is an ideal tool to help you get rid of the clutter of your camera.
Be Patient
It takes time to get the perfect shot in low-light night photography. It doesn’t matter what you bring with you or what skills you have. You just have to be patient to get the best Night Photos. In some cases, this can take up to a minute, and sometimes more than an hour. An important reason behind this is the unique object and time. Objects can be a sky and its materials, street views, rivers or lakes, and any other interesting thing. And, the time frame varies with the photo space, subject, and environment. So, try to keep all the issues in mind. It takes quite a while to do all this together.
Location
Location is always important for any type of photography. Whether you are planning night photography, it is sensitive to choose. So it is important to research the destination before shooting. You can’t mix it with daylight photography and its locations. Finding an interesting foreground that helps keep your night photos memorable is essential. One thing to keep in mind here, too, is that you need to think about the season you choose for your photography. Since it is nighttime, it should be considered before going out for your expected position.
Choose Interesting Subjects
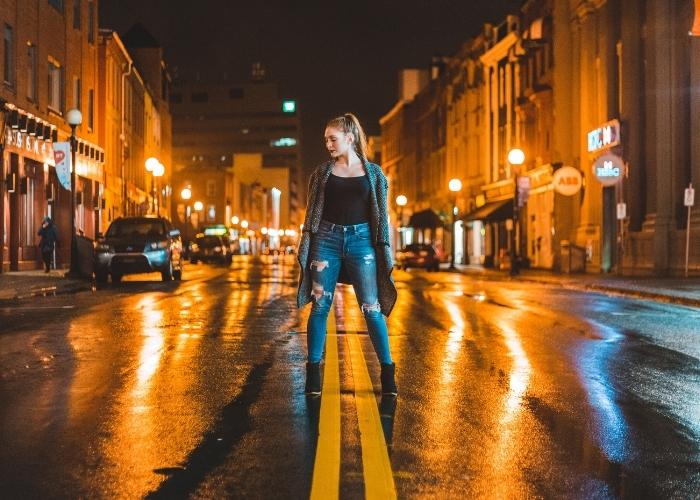
The interesting thing that is always admirable is to have amazing and memorable pictures. If the style, as well as The interesting thing that is always admirable, is to have amazing and memorable pictures. If the style, as well as the elements, are unique and attractive, it can easily attract viewers. So, what are the ideal things to really capture attention? It can be museums, public buildings, bridges, and also fountains. In addition to these, you can take street lights, car light paths, lake views, and much more. In fact, it is the kind of innovation you should invent.
Shoot Raw In Night Photography
JPEG is the most popular and widely used image format. It does not need to be converted to any other format. However, whether it is a reality of Night Photography, you should shoot raw rather than JPEG format. There are some logical explanations behind this. First, the raw files bring high-quality images because it captures all the relevant data from the camera sensor.
Second, it comes with increased brightness compared to other formats. Even after the post-processing task, it gives you bright pictures. There is nothing big about losing quality in the raw format. In addition, it has many color variations and can process files to the values of your choice.
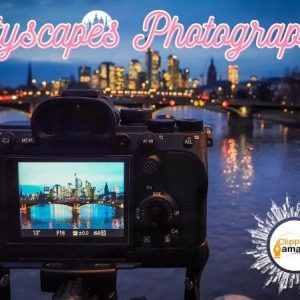
Capture Sky And Its Materials
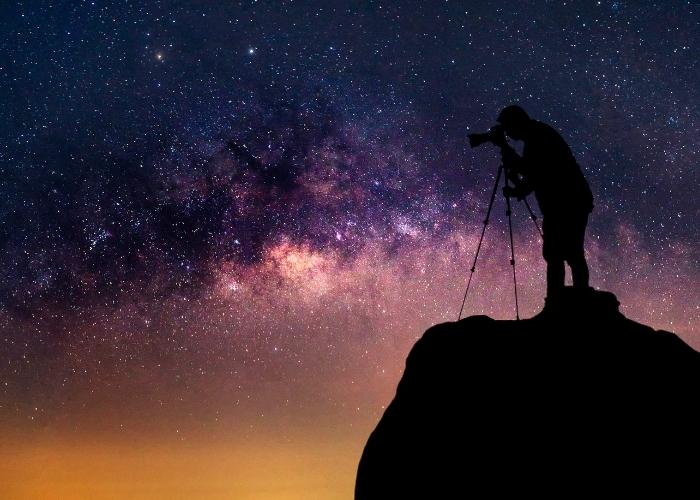
You may ask – why are we talking separately! Well! The sky, moon, stars, and other sky materials are considered the main elements of night photography. So, if you want to capture the best night scenes, you can’t avoid it. Check the weather and sky conditions before shooting. The reason is- if the sky is cloudy you will not get good results. In this condition, the moon and stars cannot be seen. So, make sure the condition is good enough to create high-quality night sky pictures. Also, be sure to customize the night sky photography settings according to the environment.
Bulb Mode
This is one of the night photography techniques that really work. Bulb mode is a creative way to capture night photos with a long exposure Typically, the shutter speed is within 30 seconds by default. In night photography, however, it may take a few more moments to frame the dark scenes. This setting lets you keep the shutter speed open until you turn it off. In a word, it gives you ultimate control. Also, you can illuminate any dark scene using this mode. One thing to keep in mind here. Your remote shutter release should be better set up to make the process more comfortable and free from unwanted movement.
Post Processing
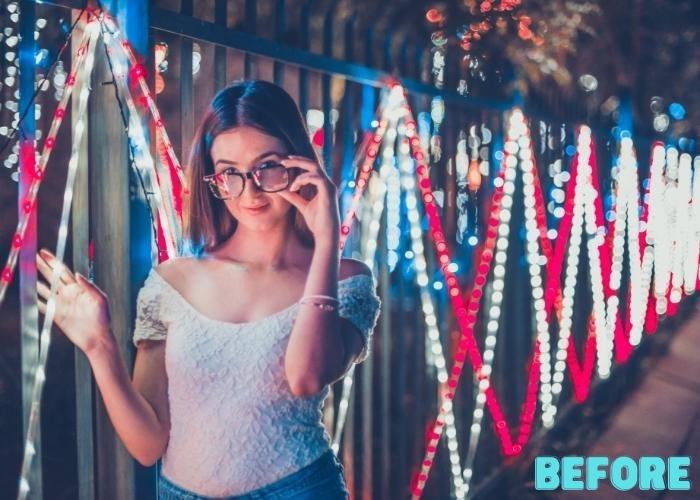
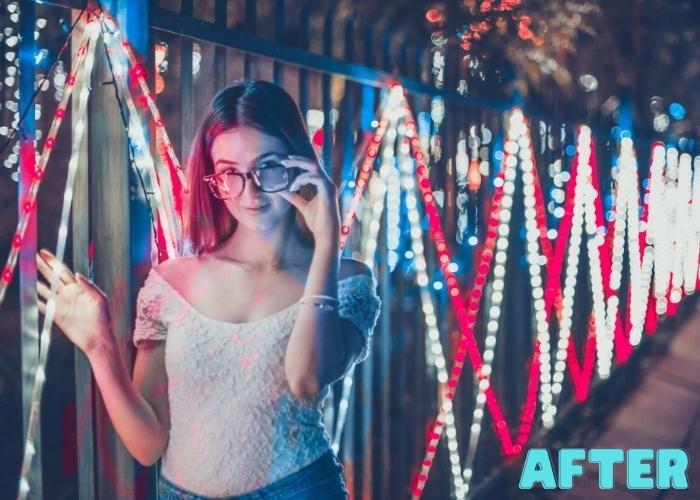
Using the best post-processing services is essential to turn night shooting photos into an extraordinary ones. There are some basic and advanced ways to get the process done through expert hands. Any well-known and reputable photo retouching service provider like Clipping Amazon can edit using the latest technology. Basically, the color balance of night photography needs to be adjusted and corrected for light pollution. You can use curve tools to improve lighting and color.
Night Photography Practice
After providing a full night photography guide, this is an extra part for you. We all know the importance of practice for a specific task to get good results. Since night photography is something special and sensitive compared to other parts, it requires more effort for beginners and professionals. There is no substitute for this stage if you want to remember some amazing memories of the night scene forever.
Go to different locations, use multiple angles, focus on lighting and composition, and keep learning things from professionals. Take test shots as much as possible. It helps you get some creative ideas. Also, be sure to adjust the settings according to the requirements of the scene and the time. Finally, when you feel the taste of shooting at night, and the idea of night photography also grows. Of course, it will be fun for you.
Conclusion
Night photography is magical if you capture it from right angles with perfect lighting and focus. It may take a few extra moments to get the best results. However, you must make your photography skills memorable for a lifetime. Since it requires the hand of an expert to get it done, it is best to put in some extra effort. Proper settings need to be maintained to select the right camera and other necessary equipment. We’ve already provided this to let you know in the title section of this article right after the introduction. Next, you’ve got some important night photography tips and tricks to make it exceptional.
Hopefully, this will help you to take your photography skills to another level. In addition, if you need to polish night photos
by professionals, the Clipping Amazon team provides the best service in this area. It provides all kinds of Photo Editing Services including clipping paths, ghost mannequins, image masking, color correction, photography post-production, raster to vector conversion, 3D modeling, and much more.
You can test the quality using the Free Trial. If you think it’s okay to go with us, send us a quote request with the necessary files.